Apache に無料の SSL 証明書をインストールする
- 前提条件
まず最初に Apache と SSL のモジュールがインストールされている必要があります。
(パッケージ名「httpd」「mod_ssl」)
インストールされていない場合はパッケージ「httpd」「mod_ssl」をインストールします。$ sudo dnf install httpd mod_ssl
次に Apache が問題なくを起動することを確認します。$ sudo systemctl start httpd
$ sudo systemctl status httpd
● httpd.service – The Apache HTTP Server
Loaded: loaded (/usr/lib/systemd/system/httpd.service; enabled; vendor preset: disabled)
Drop-In: /usr/lib/systemd/system/httpd.service.d
└─php-fpm.conf
Active: active (running) since Wed 2021-12-22 12:41:24 JST; 10h ago
Docs: man:httpd.service(8)
Main PID: 204921 (httpd)
Status: “Total requests: 1957; Idle/Busy workers 100/0;Requests/sec: 0.0538; Bytes served/sec: 1.7KB/sec”
Tasks: 231 (limit: 115875)
Memory: 42.4M
CPU: 41.508s
CGroup: /system.slice/httpd.service
├─204921 /usr/sbin/httpd -DFOREGROUND
├─229110 /usr/sbin/httpd -DFOREGROUND
├─229111 /usr/sbin/httpd -DFOREGROUND
├─229112 /usr/sbin/httpd -DFOREGROUND
├─229113 /usr/sbin/httpd -DFOREGROUND
├─229114 /usr/sbin/httpd -DFOREGROUND
└─229499 /usr/sbin/httpd -DFOREGROUND - 「certbot」とプラグインの「python3-certbot-apache」をインストールします。
$ sudo dnf install certbot python3-certbot-apache
※ CertBot は Let’s Encrypt のクライアントソフトであり、これを通して SSL の無料証明書を入手できます。
※ python3-certbot-apache は CertBot の Apache 用のプラグインです。nginx 用は python3-certbot-nginx になります。 - apache の SSL 設定ファイル「/etc/httpd/conf.d/ssl.conf」を編集します。
「/etc/letsencrypt/options-ssl-apache.conf」を作成。(失敗しても問題なく作成されます)
※ 「-」は2つ$ sudo certbot –apache 気にせず次へ。
※ 仮にサーバーURLを「www.magic-object.com」としておきます。$ sudo vi /etc/httpd/conf.d/ssl.conf - ポート番号80番のパーチャルホストを追加しておきます。
<VirtualHost *:80>
ServerName www.magic-object.com
SSLEngine off
</VirtualHost>
※ CertBot ではポート番号80番がパーチャルホストとして指定されている必要があります。 - ポート番号443番に CeatBot 用の設定を読み込ませます。
<VirtualHost *:443>

Include /etc/letsencrypt/options-ssl-apache.conf
ServerName www.magic-object.com:443
〜以下略〜
</VirtualHost>
※ 「/etc/letsencrypt/options-ssl-apache.conf」 は「python3-certbot-apache」パッケージをインストールした段階で存在します。 - Apache を再起動します。
$ sudo systemctl restart httpd
- ポート番号80番のパーチャルホストを追加しておきます。
- CertBot を実行します。
証明書を作成するとき、必ず外部(インターネット)からアクセスできる状態でなければいけません。
「sudo certbot --apache」を実行します。
※ 「-」は2つ$ sudo certbot –apache
Saving debug log to /var/log/letsencrypt/letsencrypt.logWhich names would you like to activate HTTPS for?
– – – – – – – – – – – – – – – – – – – – – – – – – – – – – – – – – – – – – – – –
1: www.magic-object.com
– – – – – – – – – – – – – – – – – – – – – – – – – – – – – – – – – – – – – – – –
Select the appropriate numbers separated by commas and/or spaces, or leave input
blank to select all options shown (Enter ‘c’ to cancel): 1
Requesting a certificate for www.magic-object.comSuccessfully received certificate.
Certificate is saved at: /etc/letsencrypt/live/www.magic-object.com/fullchain.pem
Key is saved at: /etc/letsencrypt/live/www.magic-object.com/privkey.pem
This certificate expires on 2022-04-13.
These files will be updated when the certificate renews.
Certbot has set up a scheduled task to automatically renew this certificate in the background.Deploying certificate
Successfully deployed certificate for www.magic-object.com to /etc/httpd/conf.d/ssl.conf
Congratulations! You have successfully enabled HTTPS on https://www.magic-object.com– – – – – – – – – – – – – – – – – – – – – – – – – – – – – – – – – – – – – – – –
If you like Certbot, please consider supporting our work by:
* Donating to ISRG / Let’s Encrypt: https://letsencrypt.org/donate
* Donating to EFF: https://eff.org/donate-le
– – – – – – – – – – – – – – – – – – – – – – – – – – – – – – – – – – – – – – – –※ 「www.magic-object.com」に対するSSL 証明書が作成され、「/etc/httpd/conf.d/ssl.conf」の内容が自動更新されています。
- apache の SSL 設定ファイル「/etc/httpd/conf.d/ssl.conf」の内容を確認します。
$ sudo vi /etc/httpd/conf.d/ssl.conf
※ 仮にサーバーURLを「www.magic-object.com」としておきます。- ポート番号80番のパーチャルホスト確認。
<VirtualHost *:80>
ServerName www.magic-object.com
SSLEngine off
RewriteEngine on
RewriteCond %{SERVER_NAME} =www.magic-object.com
RewriteRule ^ https://%{SERVER_NAME}%{REQUEST_URI} [END,NE,R=permanent]
</VirtualHost>
※ ポート番号80番にアクセスした場合、「https://」にりダイレクトする項目が追加されている。 - ポート番号443番のパーチャルホスト確認。
<VirtualHost *:443>
〜以下略〜SSLCertificateFile /etc/letsencrypt/live/www.magic-object.com/fullchain.pem
SSLCertificateKeyFile /etc/letsencrypt/live/www.magic-object.com/privkey.pem
</VirtualHost>
※ 自動取得した SSL 証明書ファイルが追加されている。 - Apache を再起動します。
$ sudo systemctl restart httpd
- ポート番号80番のパーチャルホスト確認。
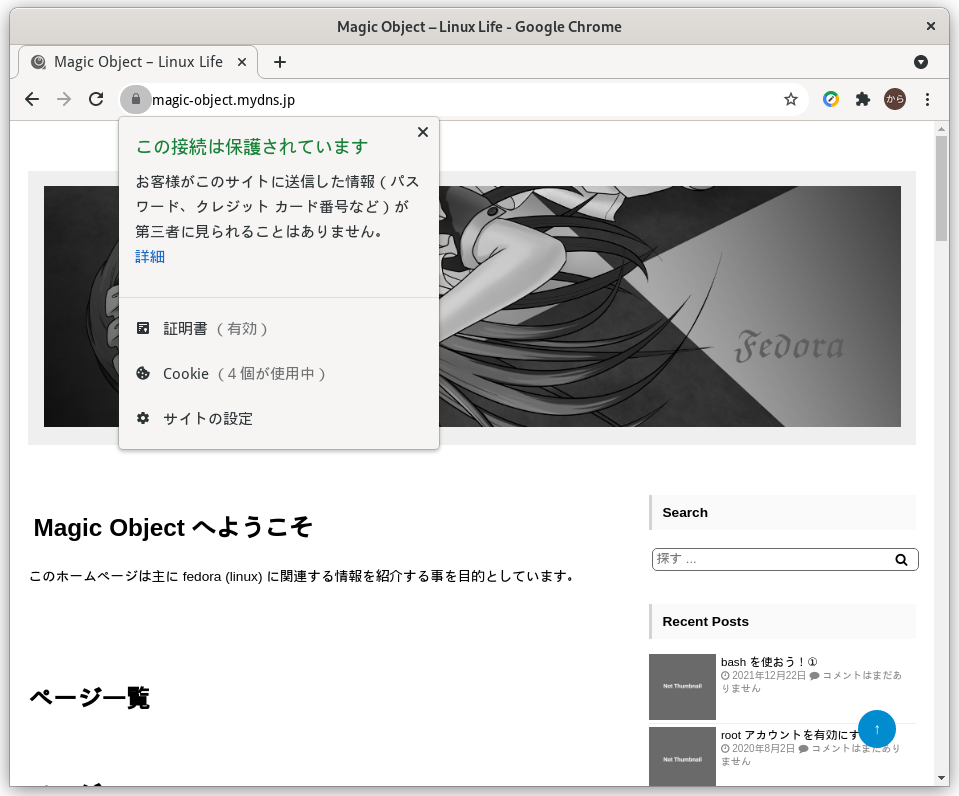
- 動作確認

- SSL 証明書の更新処理(非推奨)
※ この方法ではポート80番の使用により更新に失敗する様です。
「/etc/cron.daily/certbot-renew.sh」ファイルの作成(新規)$ sudo vi /etc/cron.daily/certbot-renew.sh
「/etc/cron.daily/certbot-renew.sh」ファイルの中身#!/bin/bash
certbot renew
「/etc/cron.daily/certbot-renew.sh」に実行権を付与$ sudo chmod +x /etc/cron.daily/certbot-renew.sh
- SSL 証明書の更新処理(推奨)
# vi /etc/sysconfig/certbot
証明書が変わると再起動させて読み込ませる必要がある。そこで証明書を利用させているサービスは全て一時的に停止させてリスタートさせる設定を記述する。
PRE_HOOK="--pre-hook 'systemctl stop httpd dovecot postfix'"
POST_HOOK="--post-hook 'systemctl restart httpd dovecot postfix'"
次に更新タイマーを有効化する。
# systemctl enable certbot-renew.timer
タイマーの確認(certbot-renew.timer が入っていれば OK)
# systemctl list-timers
NEXT                            LEFT LAST                              PASSED UNIT                         ACTIVATES
Mon 2025-06-09 00:25:00 JST 3min 59s Sun 2025-06-08 23:55:01 JST    25min ago pmlogger_check.timer         pmlogger_check.service
Mon 2025-06-09 00:25:10 JST  4min 9s Sun 2025-06-08 23:55:11 JST    25min ago pmlogger_farm_check.timer    pmlogger_farm_check.service
Mon 2025-06-09 00:28:00 JST     6min Sun 2025-06-08 23:58:01 JST    22min ago pmie_check.timer             pmie_check.service
Mon 2025-06-09 00:28:10 JST     7min Sun 2025-06-08 23:58:11 JST    22min ago pmie_farm_check.timer        pmie_farm_check.service
Mon 2025-06-09 00:44:09 JST    23min Sun 2025-06-08 00:37:09 JST            - plocate-updatedb.timer       plocate-updatedb.service
Mon 2025-06-09 00:50:41 JST    29min Sun 2025-06-08 00:43:24 JST            - logrotate.timer              logrotate.service
Mon 2025-06-09 01:01:59 JST    40min Mon 2025-06-02 01:30:32 JST            - fstrim.timer                 fstrim.service
Mon 2025-06-09 03:17:46 JST 2h 56min Sun 2025-06-08 03:17:46 JST      21h ago systemd-tmpfiles-clean.timer systemd-tmpfiles-clean.service
Mon 2025-06-09 09:10:34 JST       8h Sun 2025-06-08 20:36:39 JST 3h 44min ago certbot-renew.timer          certbot-renew.service
Tue 2025-06-10 00:00:00 JST      23h Mon 2025-06-09 00:00:01 JST    20min ago unbound-anchor.timer         unbound-anchor.service
Tue 2025-06-10 00:08:00 JST      23h Mon 2025-06-09 00:08:01 JST    12min ago pmie_daily.timer             pmie_daily.service
Tue 2025-06-10 00:10:00 JST      23h Mon 2025-06-09 00:10:01 JST    10min ago pmlogger_daily.timer         pmlogger_daily.service
Sun 2025-06-15 01:00:00 JST   6 days Sun 2025-06-08 01:00:08 JST            - raid-check.timer             raid-check.service

13 timers listed.
Pass --all to see loaded but inactive timers, too. - メールアドレスの登録
期限切れの通知メールを受信する。
# certbot update_account --email 'メールアドレス'
- その他
参考にしたサイトはコチラ
他の Linux や UNIX、MacOSX を利用している場合は、コチラを参照してください。(公式)
※ 公式では、Snap を利用してインストールしています。
